If your application does not have a command line interface, or if it has a graphical interface that you would prefer to use then you can make use of X to export this interface back to your computer.
You will need to install an X client on your computer, such as Xming for windows or Xquartz for Mac. If Xming does not work for your application you can try an alternative such as MobaXterm.
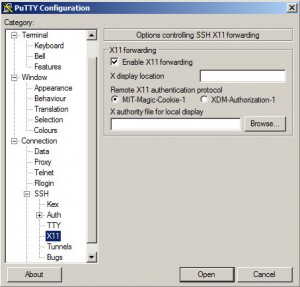
Before logging in you need to enable X11 forwarding in your ssh client, for example in PuTTY:
It is recommended that you save a ssh session in PuTTY with this option enabled to avoid repeating this each time you login.
You then need to run a X client on your computer, we recommend Xming which is free. This needs to be running each time you want to connect a graphical application to your computer from the cluster.
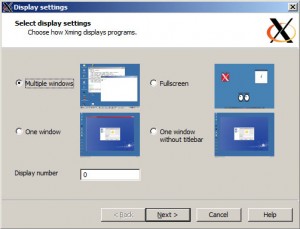
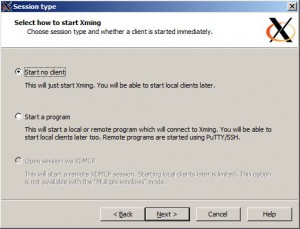
Run Xlaunch.exe
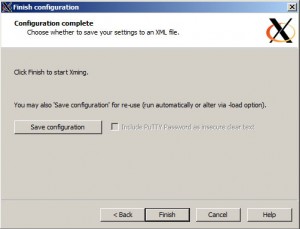
Select “Multiple windows” and “Start no client”.
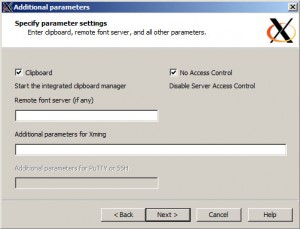
To do a brief test ensure that No Access Control is selected, then click Finish. For future use you will need to add all hpc nodes to the C:\Program Files (x86)\X0.hosts config file on your computer to enable secure access only. Selecting No Access Control is a security risk! To protect your computer do not run jobs with No Access Control selected.
The cluster needs an environment variable to let the application know where to stream the graphic interface to. If you do not set X11 forwarding as described above then you will need to set this variable manually with:
export DISPLAY=my.ip.addr:0.0
NB: there are no spaces around the = sign and the IP address is your computer. The 0.0 is the default display number on your computer.
Graphical interactive jobs
The command sintx automatically sets up the DISPLAY environment and launches an interactive job for you.
To do a brief test run an interactive job by typing sintx, wait for the job to start and then type xclock. A clock should now appear on your desktop. Close the clock and then type exit to end your interactive job.
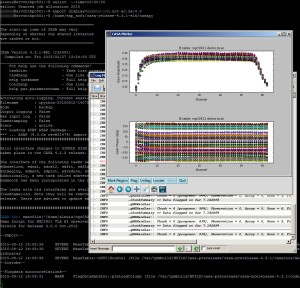
Below is an example of sintx. The user initiates an interactive session with the sintx command and launches the application, in this case CASA. The application is controlled via the user’s desktop.
Graphical sbatch jobs
To send the graphical output of a job to your desktop first ensure you have started a local X client.
Create a normal sbatch script, however it should have the command “source setx” prior to the graphical command in the script, for example:
#!/bin/sh
#SBATCH --ntasks=1
source setx
xclock
The above example will launch a graphical clock on your desktop.
Security
Once again you are reminded to set up the X0.hosts config file on your computer for security reasons and not to run Xming with No Access Control ticked. Create a X0.hosts file in the following format:
localhost
srvrochpc001.uct.ac.za
srvrochpc100.uct.ac.za
srvrochpc101.uct.ac.za
srvrochpc102.uct.ac.za
srvrochpc103.uct.ac.za
srvrochpc104.uct.ac.za
srvrochpc105.uct.ac.za
srvrochpc106.uct.ac.za
srvrochpc207.uct.ac.za
srvrochpc108.uct.ac.za
srvrochpc109.uct.ac.za
srvrochpc110.uct.ac.za
srvrochpc111.uct.ac.za
srvrochpc112.uct.ac.za
srvrochpc213.uct.ac.za
srvrochpc214.uct.ac.za
srvrochpc215.uct.ac.za
srvrochpc216.uct.ac.za
srvrochpc217.uct.ac.za
srvrochpc218.uct.ac.za
srvrochpc219.uct.ac.za
srvrochpc220.uct.ac.za
srvrochpc221.uct.ac.za
srvrochpc222.uct.ac.za
srvrochpc223.uct.ac.za
srvrochpc224.uct.ac.za
srvrochpc225.uct.ac.za
srvrochpc226.uct.ac.za
srvrochpc227.uct.ac.za
srvrochpc228.uct.ac.za
srvrochpc229.uct.ac.za
srvrochpc230.uct.ac.za
srvrochpc231.uct.ac.za
srvrochpc232.uct.ac.za
srvrcohpc233.uct.ac.za
srvrochpc234.uct.ac.za
srvrochpc235.uct.ac.za
srvrochpc100.uct.ac.za
srvrochpc101.uct.ac.za
srvrochpc102.uct.ac.za
srvrochpc103.uct.ac.za
srvrochpc104.uct.ac.za
srvrochpc105.uct.ac.za
srvrochpc106.uct.ac.za
srvrochpc107.uct.ac.za
srvrochpc108.uct.ac.za
srvrochpc109.uct.ac.za
srvrochpc110.uct.ac.za
srvrochpc111.uct.ac.za
srvrochpc112.uct.ac.za
srvrochpc113.uct.ac.za
srvrochpc114.uct.ac.za
srvrochpc115.uct.ac.za
srvrocgpu005.uct.ac.za
srvrocgpu006.uct.ac.za
srvrocgpu007.uct.ac.za
srvrocgpu008.uct.ac.za
srvrocgpu009.uct.ac.za
srvrocgpu010.uct.ac.za
srvrocgpu011.uct.ac.za
srvrocgpu012.uct.ac.za
srvrocgpu013.uct.ac.za
srvrocgpu014.uct.ac.za
srvrocgpu015.uct.ac.za
And copy this to C:\Program Files (x86)\Xming. Ensure No Access Control is not ticked when launching Xming.
You may need to add additional hosts to this file if you are running jobs on the GPU or high memory nodes etc. See our worker node list for more details.

